

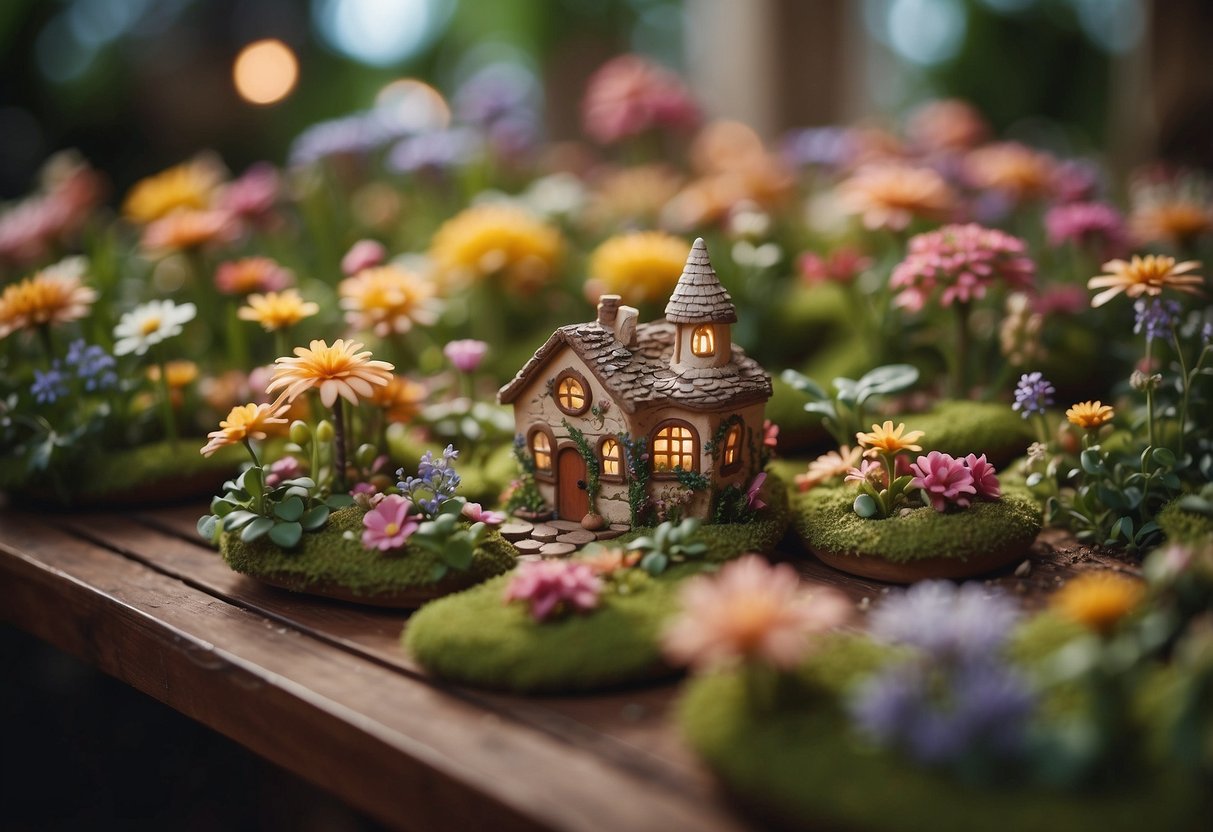
Clay Fairy Garden Ideas: Delightful Miniature Landscapes
Creating a clay fairy garden is a delightful way to add a touch of magic to your outdoor or indoor spaces. These miniature gardens allow you to unleash your creativity and design enchanting scenes with tiny fairy houses, colorful plants, and whimsical accessories.

Why make a clay fairy garden? They are perfect for adding unique, handmade touches to your garden, balcony, or even your living room. Whether you’re an experienced gardener or just starting, these projects are easy and fun for all ages.
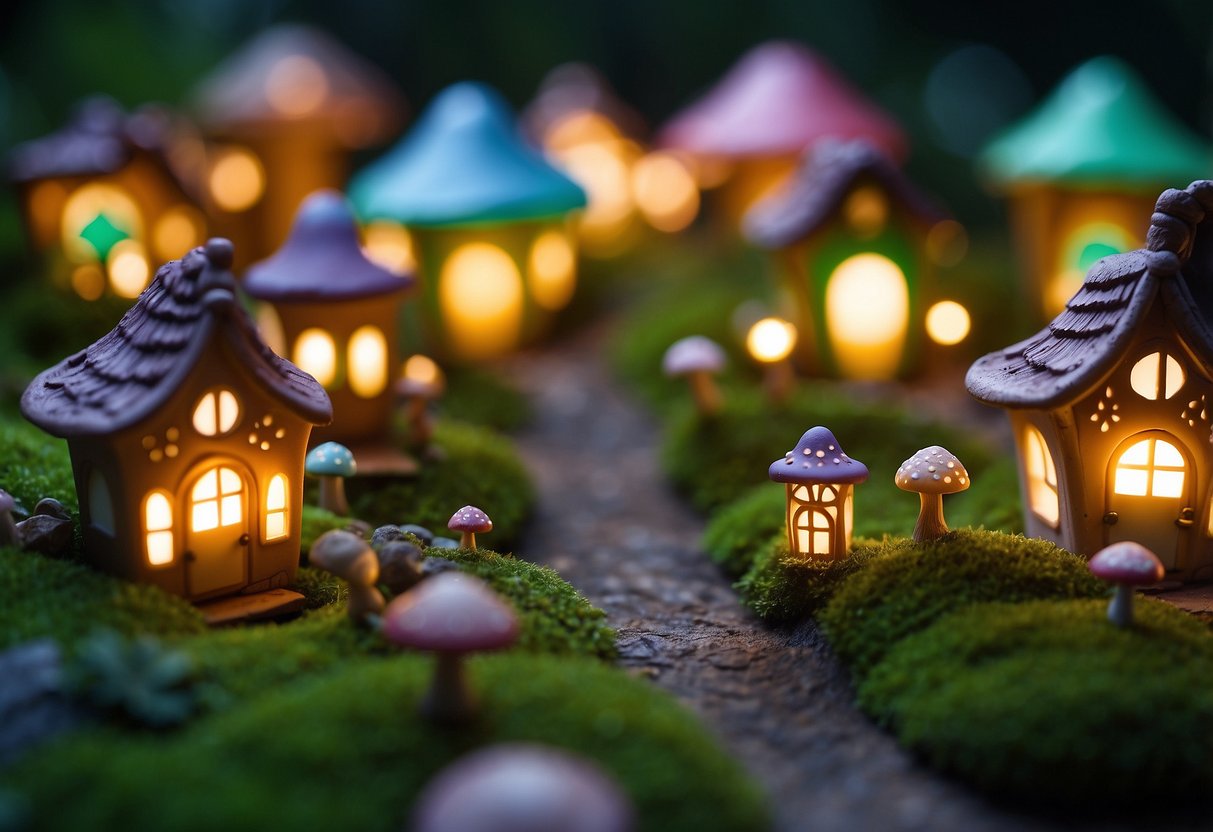
1) Cute Mushroom Houses

Mushroom houses are a delightful addition to any fairy garden, adding a touch of whimsy and magic.
You can start by molding the mushroom cap from clay, using simple tools to shape it into a dome.
Once you have the shape, paint the mushroom with bright colors like red and white. Add small windows and doors to make it look more charming.
Don’t forget to create a small clay base and attach the mushroom cap to it. You can even add tiny clay furniture or decorations around the house for a complete look.
2) Miniature Clay Fairies
Creating miniature clay fairies can be a fun project for your fairy garden. You can use polymer clay, which is easy to mold and comes in many colors. Start by forming the body and head with simple shapes like ovals or balls.
Add tiny details to your fairies, like wings and hair. Use tools like a dry paint brush or a tiny screwdriver to shape and texture the clay. Let your imagination guide you.
For inspiration, check out the Empress of Dirt for tips on making charming fairy figures. Have fun and enjoy crafting your unique miniature clay fairies!
3) Tiny Clay Toadstools

Creating tiny clay toadstools for your fairy garden is a fun and easy project. You can use polymer clay to shape the mushroom caps and stems. Roll a small ball of red clay, then press it flat with a ball tool to form the cap.
For the stems, roll white clay into small cylinders. Attach the caps to the stems and bake them at 250 °F for about 10 minutes. Once cooled, you can paint them in various colors and add white dots for a whimsical look.
4) Magical Fairy Doors

Crafting magical fairy doors for your clay fairy garden can add a charming touch. Use strong materials like popsicle sticks or balsa wood to ensure durability. Paint the doors in bright colors like orange or blue to create a welcoming entrance.
Add tiny details such as miniature doorknobs or windows. Place these doors at the base of trees or nestled among the plants to create hidden fairy homes. Make sure to keep all your accessories in proportion to maintain a realistic look. Check out some creative ideas for fairy doors here.
5) Adorable Clay Animals
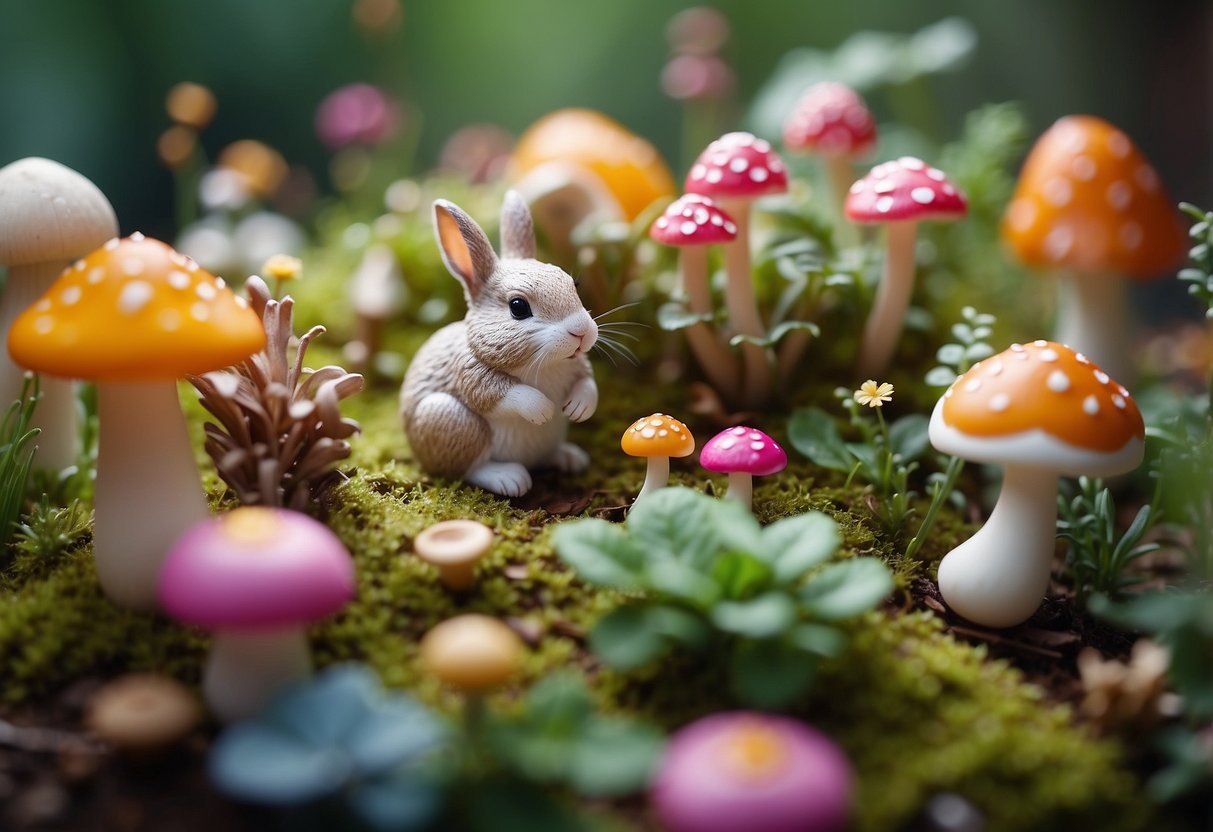
Creating tiny clay animals for your fairy garden is a fun way to add charm. You can start with simple shapes like snails, birds, and bunnies. Roll out clay to form various body parts and attach them carefully.
Use a small tool, like a toothpick, to add details such as eyes and mouths. You can paint them with acrylics to give them vibrant colors. Try making a clay turtle or a cat to sit next to your fairy house. These adorable animals will make your fairy garden even more magical.
For more creative ideas, check out this guide to DIY clay fairy garden accessories.
6) Pixie Lanterns
Pixie lanterns add a magical touch to your clay fairy garden. You can make these tiny lanterns using clay, small LED lights, and a bit of creativity.
Shape the clay into little lanterns, allowing some openings for the light to shine through. Once they’ve hardened, place the LED lights inside.
Place these lanterns around your fairy garden to create a warm and enchanting glow. They look especially charming in the evening, transforming your garden into a fairy wonderland. Add a few around pathways or near fairy houses for extra magic.
7) Fairy Sign Posts
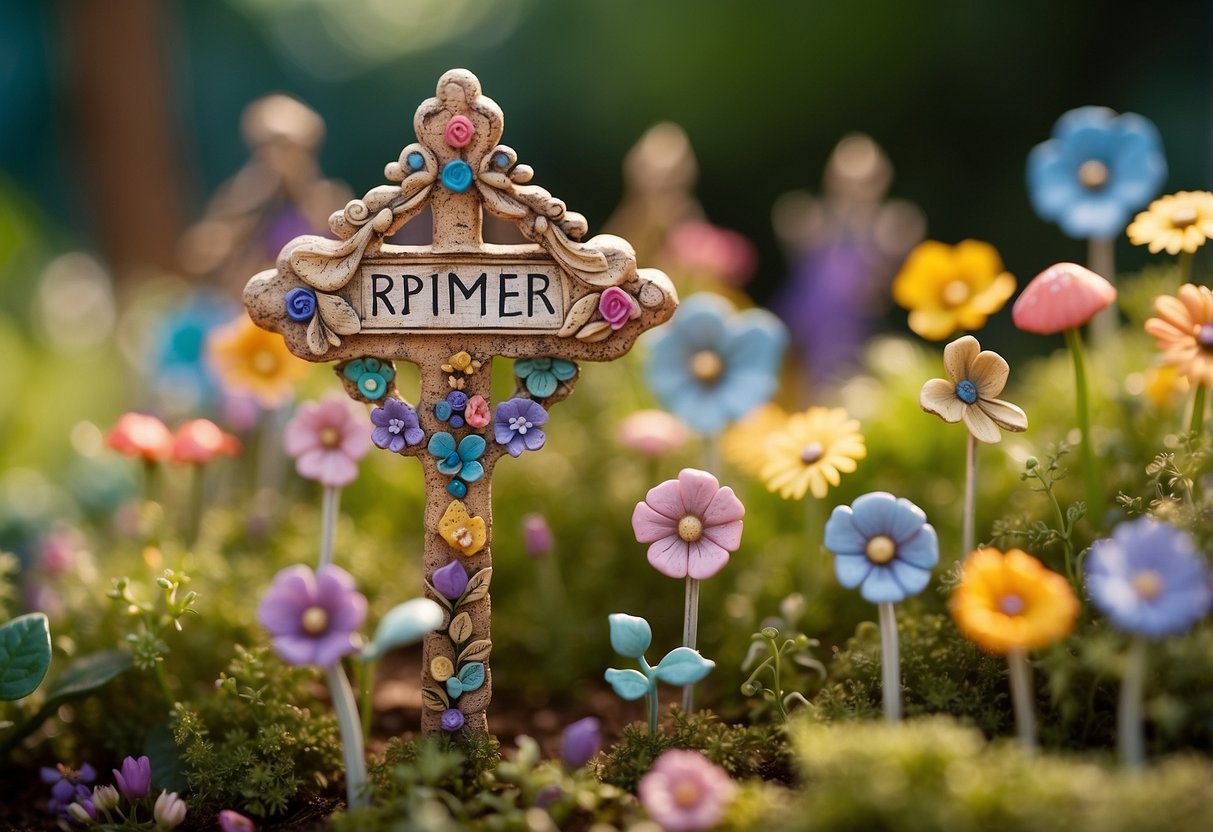
Fairy sign posts can add a charming touch to your clay fairy garden.
You can make them using small pieces of wood or twigs.
Write down magical names like “Fairy Land” or “Gnome Village” on mini signs.
Use paint or a fine-tip marker for the text.
Place these signs around your garden to guide your tiny fairy friends.
This little detail can bring a lot of joy to your garden scene.
8) Clay Flower Decorations
Creating clay flowers for your fairy garden can be a fun and relaxing activity. You can start by shaping small petal pieces and assembling them into flowers.
Use bright colors to make the flowers stand out. Experiment with different flower types and sizes to add variety.
You can place your clay flowers in your fairy garden to create a beautiful and charming scene. For more ideas, you can visit this DIY Clay Fairy Garden Accessories page.
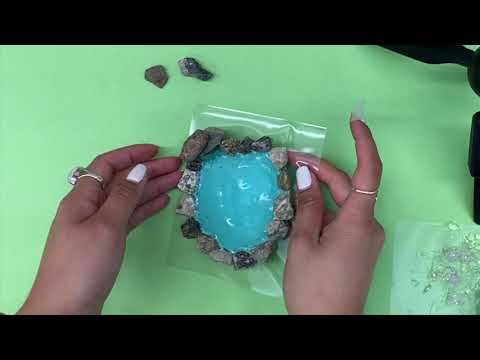
9) Tiny Clay Ponds
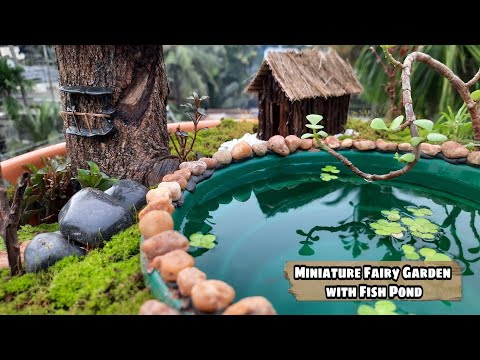
Creating tiny clay ponds for your fairy garden is simple and fun. Use polymer clay to shape the base of your pond. Add small stones or marbles around the edges for decoration.
Fill the pond with a thin layer of blue resin to mimic water. You can also use clear epoxy if you prefer.
Don’t forget to add mini plants and figurines around the pond to complete the look. This adds a magical touch to your fairy garden. For more tips, check out these DIY fairy garden accessories.
10) Enchanting Fairy Bridges
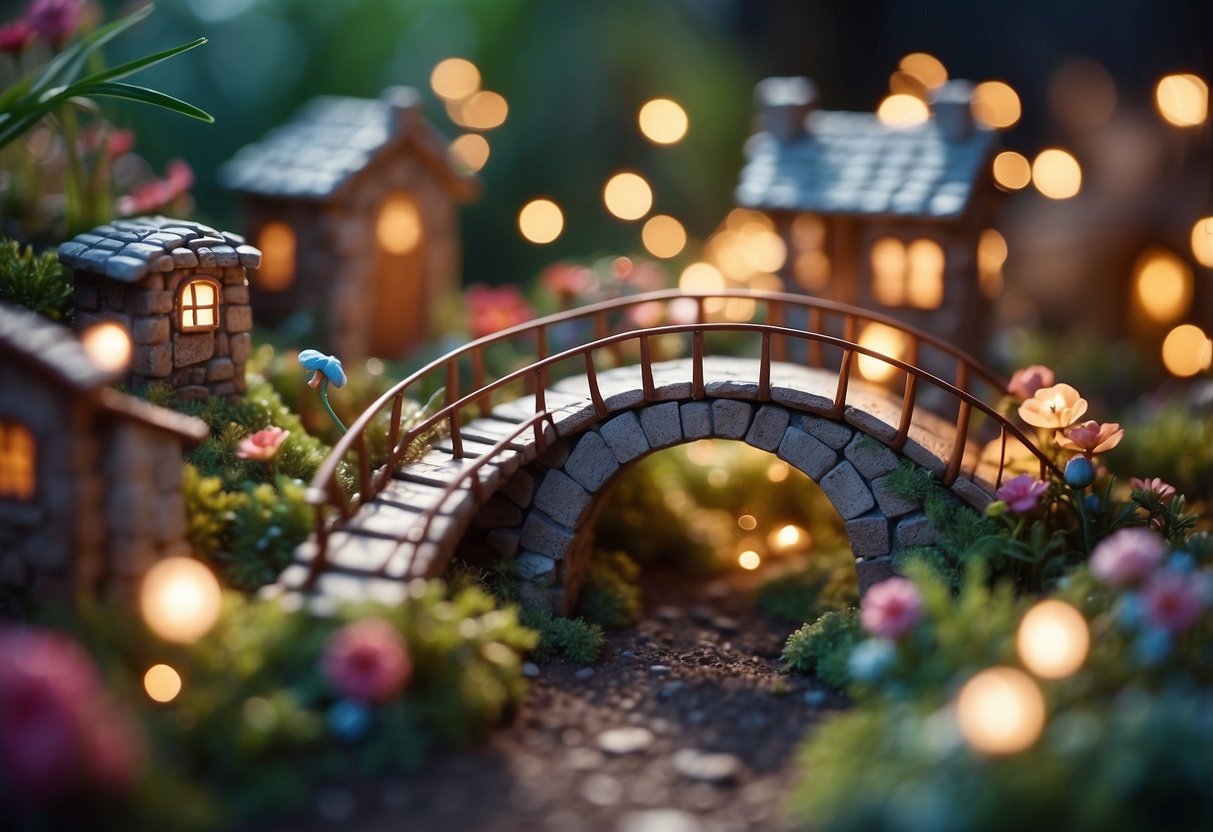
Creating fairy bridges adds a magical touch to your fairy garden. Use twigs and small branches to build a natural-looking bridge. You can glue them together with a hot glue gun for stability.
For a whimsical effect, paint the bridge in bright colors. Add moss and small stones around the base for extra charm. If you prefer a more rustic look, leave it unpainted and let the natural materials shine. A tiny, enchanting bridge brings your fairy garden to life.
Basics Of Creating A Clay Fairy Garden

Creating a clay fairy garden can be a fun and rewarding project. You’ll need to choose the right clay, gather essential tools, and properly prepare your clay for crafting.
Choosing The Right Clay
Selecting the right type of clay is crucial for your fairy garden. Polymer clay and air-dry clay are popular choices. Polymer clay can be baked to harden, making it durable and weather-resistant. It’s perfect for outdoor fairy gardens. Air-dry clay, on the other hand, doesn’t require baking and hardens at room temperature, which makes it easier to work with for beginners.
Consider the color of the clay too. Some clays come pre-colored, while others might need painting after they dry. It’s also important to note that detailed clay can include intricate designs that might be easier with one type of clay over another. Polymer clay is better for detailed work since it remains soft until baked, giving you more time to shape your figures.
Essential Tools Needed
To create your clay fairy garden, you’ll need some basic tools. A dry paint brush can help remove excess clay from your creations. A tiny screwdriver is perfect for making holes or intricate designs.
Clay cutters will help you with precise shapes. For smoothing out surfaces, use a rolling pin and some smoothing tools. Molding tools come in handy for adding textures and patterns. If you’re using polymer clay, baking sheets and an oven are necessary.
Keep a small bowl of water nearby to keep your clay moist while you work. Toothpicks or dental tools can be useful for fine details. You don’t need fancy equipment; often, everyday household items can double as excellent sculpting tools.
Preparing Your Clay
Before you start crafting, knead the clay to make it pliable. Warm it up by rolling it in your hands or on a flat surface. This makes the clay easier to mold and prevents cracks.
Conditioning your clay helps in making it more flexible. For polymer clay, you can condition it by repeatedly folding and pressing it together. For air-dry clay, spritzing it lightly with water can help if it feels too dry.
Once your clay is ready, roll it out to your desired thickness using a rolling pin. Be mindful of the thickness; too thin, and it might break, too thick, and it will take longer to dry or bake. Now, you’re set to start shaping your figures and creating the magical elements of your fairy garden.
Designing Your Fairy Garden

Creating a charming clay fairy garden involves careful planning, adding miniature structures, and selecting the right plants and foliage. Each part plays a vital role in making your fairy garden look magical and welcoming.
Planning The Layout
Start by deciding on the overall look of your fairy garden. Choose a container or section of your yard, depending on where you want your garden. Draw a simple sketch to plan where the main features will go.
Make sure there is a main focal point, like a fairy house or a tiny pond. Leave enough space between elements to prevent it from looking cluttered. Consider the lighting and think about where the sun will fall throughout the day.
Include paths made from small pebbles or pieces of wood. These small details can make a big difference in the overall appearance.
Incorporating Miniature Structures
Miniature structures like fairy houses, bridges, or benches add charm and detail to your garden. You can buy these items or make them yourself from materials like clay or wood.
Place these structures strategically to create scenes and stories. For example, a tiny bridge over a pebble path adds magic. Use items like tiny signs or mailboxes to make the space feel lived in.
Make sure the size of the structures matches well with the rest of the garden. Too many items of the same size can make the garden look too uniform and less exciting.
Adding Plants And Foliage
Plants and foliage bring life to your fairy garden. Choose small plants like ferns, moss, and succulents that fit well in your design. Make sure these plants have similar light and water needs so they thrive together.
Use colorful blooming plants to add pops of color. Mosses and creeping thyme work well as ground cover, creating a lush, green base.
Consider the placement of each plant to ensure it gets the right amount of sunlight. A mix of tall and short plants can add depth and interest to your layout.
Water the plants regularly and trim them to keep the garden tidy and beautiful.


