

Garden Dye Ideas: Creative Colors for Your Outdoor Oasis
Creating a garden dedicated to natural dyes can be a fun and rewarding way to add color to your life. You’ll discover how simple plants and flowers can yield vibrant hues for a variety of projects, from textiles to arts and crafts.

By planting specific dye-producing plants, you can transform your garden into a palette of beautiful colors. Learn about different options to grow in your garden that can provide an endless source of natural dyes for your creative needs.
1) Beetroot Dye
Using beetroot to dye fabric is a fun and natural way to create vibrant colors. Begin by chopping the beets into small chunks.
Simmer the beet chunks in a pot filled with enough water to cover them fully. Be patient, as it can take about an hour for the color to develop.
After simmering, strain the beet pieces out, and you’re left with your dye. Dip your fabric into the dye and let it soak for a rich color. For the brightest results, let your fabric soak for several hours.
Rinse the dyed fabric thoroughly in cool water to remove any excess dye.
2) Turmeric Yellow Dye

Using turmeric is a great way to get a bright yellow dye for your fabrics. You can easily find turmeric powder in most grocery stores.
Start by mixing turmeric with water to make the dye. A good ratio is 3 tablespoons of turmeric to 4 liters of water.
Before dyeing, prepare your fabric with a vinegar solution to help the dye stick. Mix 4 cups of vinegar with 16 cups of water. Heat the fabric in this solution for a while. Then, dye your fabric in the turmeric mixture for about 15 minutes.
3) Spinach Leaf Green Dye
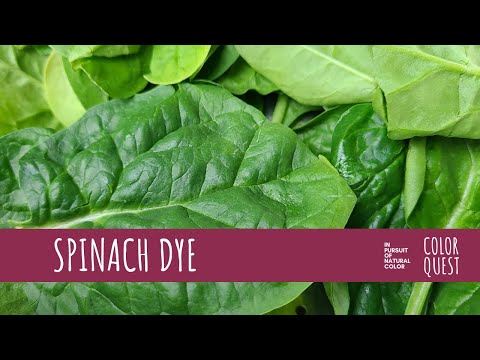
Using spinach leaves to create a green dye is a fun and natural way to color fabrics.
First, chop up the spinach leaves into small pieces.
Next, boil the chopped spinach in water for about an hour in a non-aluminum pot.
Once boiled, strain the mixture through a cheesecloth to separate the liquid dye.
For a stronger color, add some salt and white vinegar to the dye water.
4) Red Cabbage Blue Dye

Red cabbage is an easy and fun way to create blue dye for your projects.
Start by chopping one head of red cabbage. Place it in a large pot and add 4-5 cups of water.
Boil the mixture until the cabbage releases its color, about 30-45 minutes.
Strain the liquid using a colander. Add 1 to 1 1/4 tablespoons of white vinegar to the liquid to help set the dye.
Now, you have your blue dye ready! This dye works well with fabric, eggs, and other materials. For even color, soak your items until you achieve the shade you like.
Give it a try and enjoy your vibrant blue creations!
5) Onion Skin Orange Dye
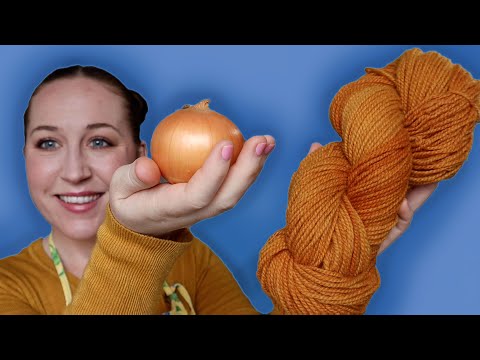
Onion skins are a fantastic natural dye source for achieving vibrant orange shades. Start by collecting the skins from yellow onions. The more you gather, the richer the color will be.
Boil the onion skins in a pot filled three-quarters with water. Simmer the mixture for 30-60 minutes until the water changes color to a deep orange.
After straining out the skins, you can add your pre-washed, wet fabric. Let it simmer for another 30 minutes. For a deeper shade, soak the fabric overnight in the dye bath.
Enjoy your beautifully dyed fabric with its warm, orange hue!
For more details, visit The Spruce Crafts.
6) Avocado Pit Pink Dye

Creating a pink dye using avocado pits is a simple and fun project. Start by gathering around 10 avocado pits.
Fill a large pot with water, about two-thirds full. Bring it to a boil, then add the avocado pits.
Let the mixture simmer for 30-60 minutes. The longer you simmer, the deeper the pink color will be.
After simmering, remove the pits and immerse your fabric into the dye. Let it soak until you get the desired shade.
For more details, visit Zero-Waste Chef’s guide.
7) Hibiscus Flower Dye

Hibiscus flowers can be a fun and natural way to dye fabrics. You start by simmering dried hibiscus flowers in water to create a dye bath.
This simple process is easy for beginners. The flowers create rich, vibrant colors. Just soak your fabric in the dye until you achieve the desired shade.
For best results, you may want to heat-set the dye with an iron afterward. This helps the color last longer. Enjoy your unique, handmade creations using hibiscus flower dye!
8) Black Walnut Brown Dye

Black walnut hulls are great for creating a rich, brown dye. Start by gathering and lightly smashing the hulls.
Boil them gently for about an hour to release the tannins. There’s no need for a mordant because the tannins make the color stick.
Once simmered, strain out the hulls and soak your fabric or yarn in the dye.
For more detailed steps, you can visit here
9) Carrot Top Dye

Carrot tops can be used to make a natural dye. You can create a lovely green color by boiling the tops.
First, trim the tops and set them aside. Boil them to release their color.
Let the yarn simmer for about 30 minutes, then dye your fabric. Remember, the dye will dry a bit lighter. Learn more about carrot top dye at Myra Made Color.
10) Blueberry Dye

Blueberry dye is a fun and easy way to get a natural blue color. You can use fresh or frozen blueberries for this project.
First, crush the berries and simmer them in water. Strain out the solids to get a purple-blue liquid.
This dye works well on natural fabrics like cotton or wool. If you want a deeper color, let the fabric soak longer. You can learn more about making blueberry dye online.
Benefits Of Natural Garden Dyes

Natural garden dyes offer numerous advantages, making them an excellent choice for sustainable and health-conscious crafting. They contribute to a healthier environment and can have positive effects on your well-being.
Eco-Friendly Advantages
Natural dyes are incredibly eco-friendly. Unlike synthetic dyes, they don’t release harmful chemicals into the environment. This helps keep water supplies clean and reduces pollution.
Growing plants for dyes can be very sustainable. Plants like indigo, marigold, and amaranth can be cultivated easily and renewably year after year. This cuts down on the need for industrial dye production, which often involves toxic processes.
Moreover, using natural dyes allows you to make use of garden plants that might otherwise be wasted. Flowers, leaves, and even roots can provide a rainbow of colors, turning potential waste into valuable resources.
By creating a dye garden, you also contribute to biodiversity. Planting a variety of dye plants supports local ecosystems and attracts beneficial insects like bees and butterflies.
Health Benefits
Using natural dyes can also be beneficial for your health. Synthetic dyes can contain harmful substances that may cause skin irritation or allergic reactions. Natural dyes reduce this risk, making them a safer option for fabrics that come in contact with your skin.
Kids’ clothing and art supplies made with natural dyes are safer. When you dye with plants like marigolds, black-eyed Susans, and fennel, you’re choosing a non-toxic option that’s gentle on young skin.
Natural dyes often have antibacterial and antifungal properties. For instance, some plant extracts used for dyeing can help reduce the growth of harmful microbes on fabrics. This is a particularly useful benefit for items like dishcloths or cleaning rags.
By opting for natural dyes, you are not only protecting your own health but also supporting a more sustainable and healthy environment for everyone.
Sources Of Plant-Based Dyes

Discovering the vibrant, natural shades that come from garden plants can be both fun and eco-friendly. Below are key areas to explore when looking for plant-based dyes: flowers and blossoms, leaves and stems, and roots and bark.
Flowers And Blossoms
Many flowers provide rich and varied colors for natural dyes. For instance, marigolds and coreopsis can produce bright yellows and oranges. Indigo is famous for its intense blue hue, which is sourced from the leaves but starts flowering to be fully effective.
Black-Eyed Susans offer an olive-green dye when you use the flowers. These beautiful blooms can be found from June to October and are quite easy to grow. The petals themselves contain the pigments, so all you need is a simple extraction process to make your dyes.
Other flowers like amaranth (‘Hopi Red Dye’) produce vibrant pinks and reds. This variety, often associated with traditional dyeing methods, shows how versatile and colorful flower-based dyes can be.
Leaves And Stems
Leaves and stems of certain plants are also excellent for dyes. The Horsetail plant is a perfect example. When you use its bristly green fronds, you can get a bright yellow or soft green dye depending on the mordant used.
Another example is the common weld plant, which provides a brilliant yellow color. Weld can be used fresh or dried, making it a versatile choice for your dye garden.
With black-eyed Susans, you don’t just get one color. The leaves and stems offer yellow or orange dyes. This plant is well-suited for various artistic projects because of its ease of use and the range of colors it can produce.
Roots And Bark
Roots and barks can also serve as rich sources for natural dyes. Madder roots are famous for yielding shades of red and orange. They’ve been used for centuries and are valued for their color fastness.
Using the bark of trees like birch can give a lovely range of natural colors. Birch bark, for example, produces a subtle, earthy hue which can be intensified by different mordants.
Another noteworthy plant is turmeric. While typically known for its root, it also serves as a powerful yellow dye. It is easy to grow and harvest, making it accessible for home dyeing projects.
By exploring these different plant parts, you can uncover a wide array of colors and deepen your appreciation for natural dyeing methods.
Tips For Dyeing Garden Fabrics

When dyeing fabrics with garden plants, preparation and safety are key. There are specific techniques to ensure the colors are vivid and long-lasting. Maintenance will keep your dyed fabrics looking great.
Preparation And Safety
Wash your fabric before starting. This removes any finishes that might block the dye. Soaking the fabric in soy milk for 48 hours can help achieve better results.
Use gloves to protect your hands from stains and any potential irritants. Work in a well-ventilated area or outside to avoid inhaling any fumes from boiling plants.
Gather all necessary materials like pots, gloves, and measuring tools. Label and store your plant materials properly to avoid confusion.
Dyeing Techniques
To make your dye, use mature, ripe plants. Chop them into small pieces. Follow a ratio of 2 parts water to 1 part plant material. Boil the mixture for one to two hours to extract the color.
Strain the liquid to remove plant bits. Make sure your fabric is wet before dyeing to help it absorb the color evenly. Dunk the fabric and simmer for at least an hour.
Experiment with different plants for a variety of hues. For red dye, use plants like Hopi Red Dye amaranth. For orange, try marigold.
Maintenance And Care
After dyeing, air-dry your fabric for one week to allow the color to set. This curing process helps the dye bind more effectively to the fabric.
Wash dyed fabrics separately in cold water to prevent the colors from bleeding. Use gentle, pH-neutral soap to maintain the vibrancy of the colors.
Store your dyed fabrics out of direct sunlight to keep the colors from fading. Consider re-dyeing fabrics every few months if the colors start to look dull. Proper care will ensure your dyed fabrics remain beautiful.


