

Glass Jar Garden Ideas: Creative Ways to Bring Greenery Indoors
Gardening in glass jars is not only a fun hobby but also a beautiful way to bring nature into your home. Imagine having your favorite plants, herbs, or flowers thriving in clear, stylish containers right on your windowsill. Why not start a glass jar garden and enjoy the benefits of greenery indoors?

Glass jar gardens are perfect for small spaces and can add a touch of elegance to any room. Whether you’re a seasoned gardener or just starting, you’ll find that growing plants in jars is both simple and rewarding. Your home will feel more lively and vibrant with these little pockets of nature.
1) Fairy Light Terrarium

A fairy light terrarium can brighten up any room with its soft, magical glow.
Start by placing a layer of small pebbles at the bottom of your jar for good drainage.
Add a layer of potting soil, then arrange small plants like succulents or ferns.
Gently tuck in a string of battery-operated fairy lights around the plants.
This creates a cozy and enchanting atmosphere.
Finally, turn on your lights and enjoy your whimsical creation!
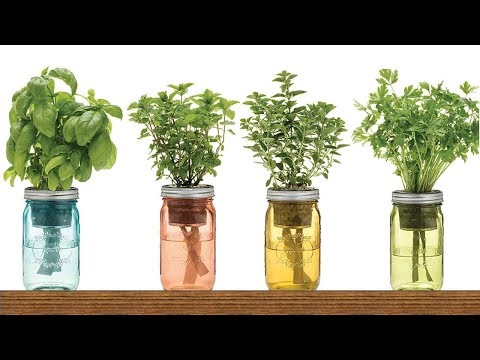
2) Mason Jar Herb Garden

You can easily create a mason jar herb garden for your kitchen. Start with a few basic supplies like mason jars, potting soil, and your favorite herb seeds.
Make sure to place small rocks at the bottom of the jars for drainage. Then, fill the jars with soil and plant the seeds or herbs.
Keep the jars in a sunny spot and water them regularly. A spray bottle can help with watering newly transplanted herbs.
Decorate the jars with labels or paint to add a personal touch. Enjoy fresh herbs right at your fingertips!
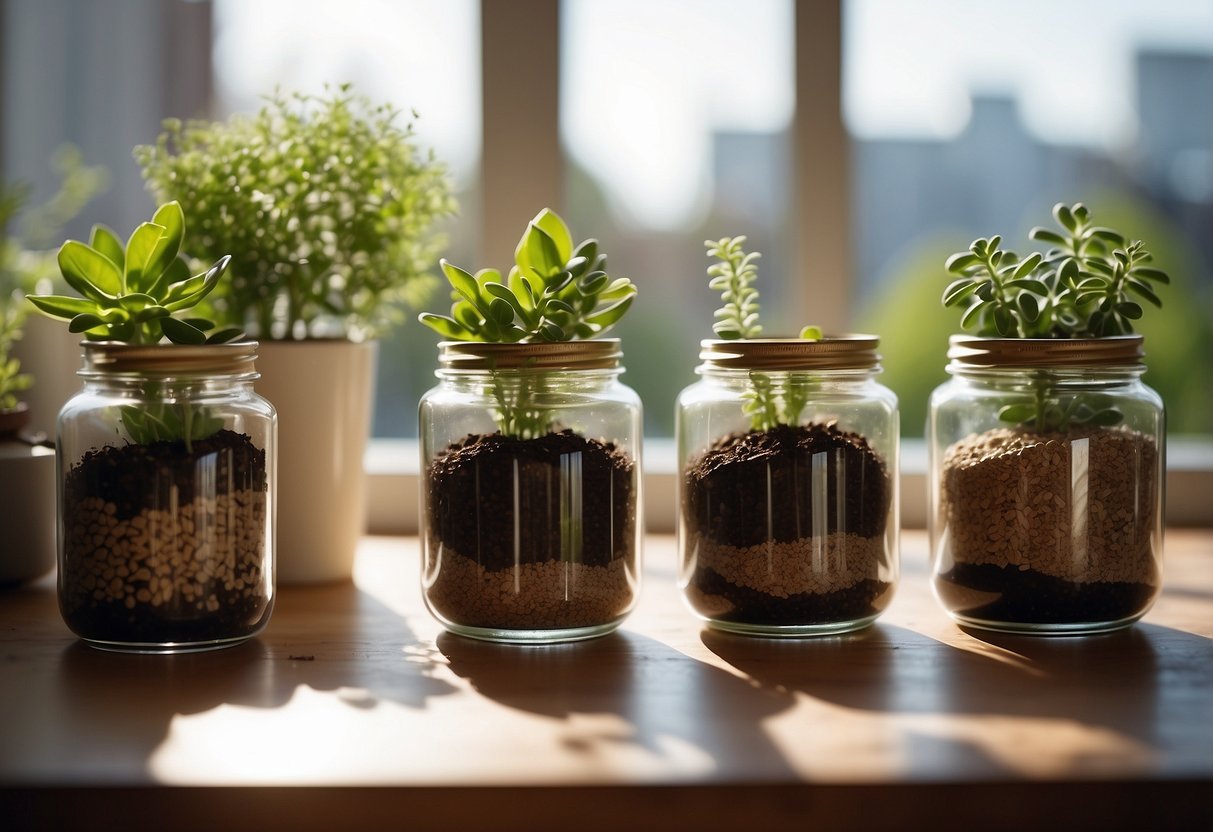
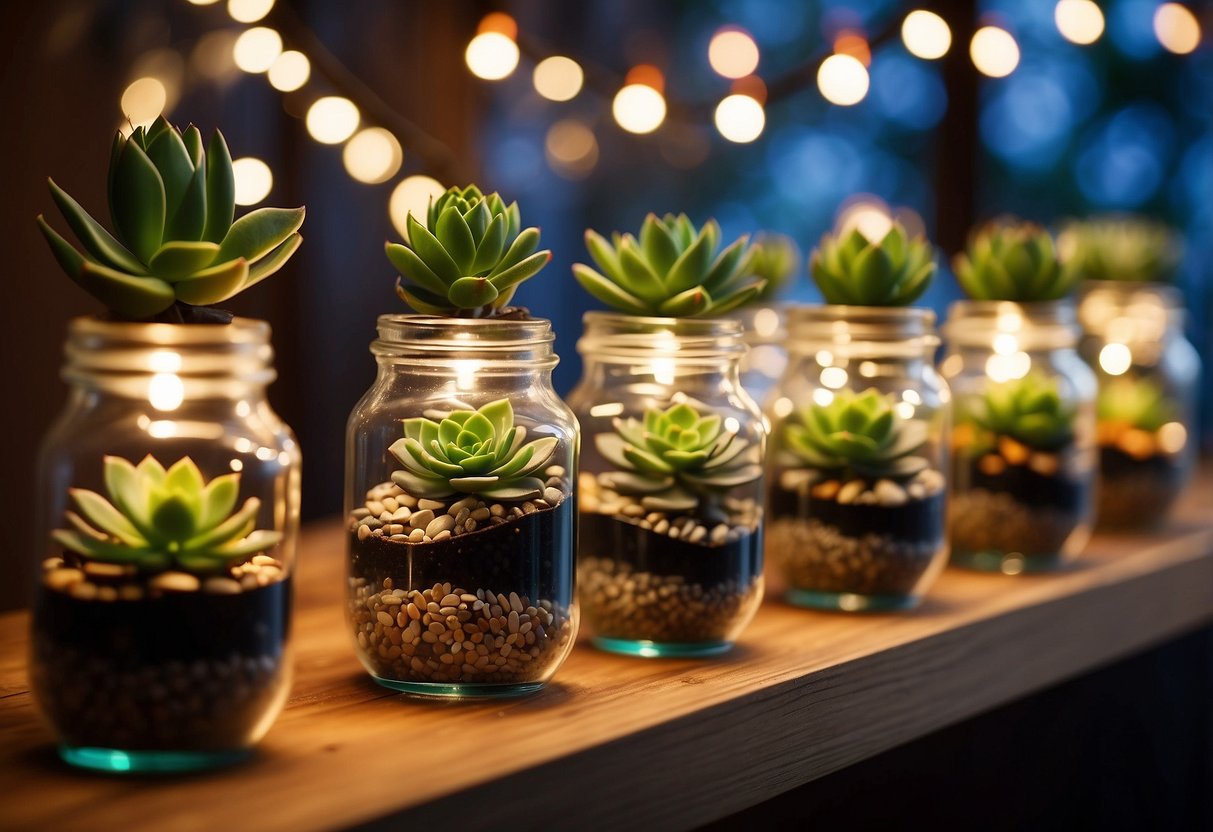
3) Succulent Jar Collection
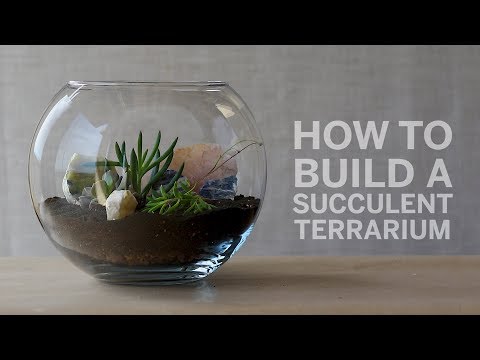
You can create a charming Succulent Jar Collection with just a few simple steps. Start by choosing a variety of glass jars in different shapes and sizes.
Next, cover the base of each jar with potting soil. Carefully place your succulents into the jars, ensuring they sit snugly.
Arrange your jars in a sunny spot in your home. Your Succulent Jar Collection will add a touch of nature to any room.
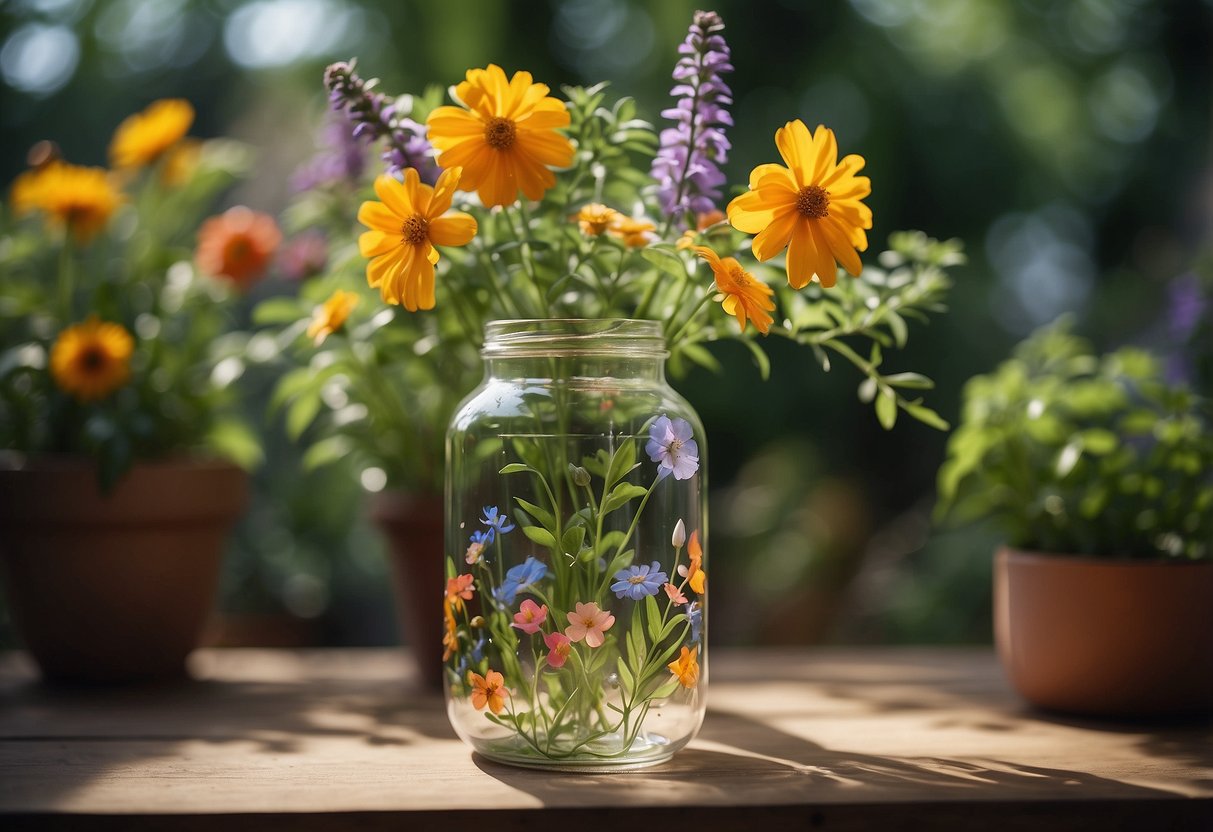
4) DIY Jar Water Garden
Creating a DIY jar water garden is a fun and easy project. You’ll need a clear glass jar, water-friendly plants, and optionally, some small fish.
Start by adding a layer of aquarium gravel at the bottom of the jar. This helps with plant support and water filtration.
Place your water plants into the jar. Some good choices are anthurium or peace lilies.
Fill the jar with water, leaving some space at the top for air. If you want, you can add a small goldfish or betta fish.
Your jar water garden is ready to display!
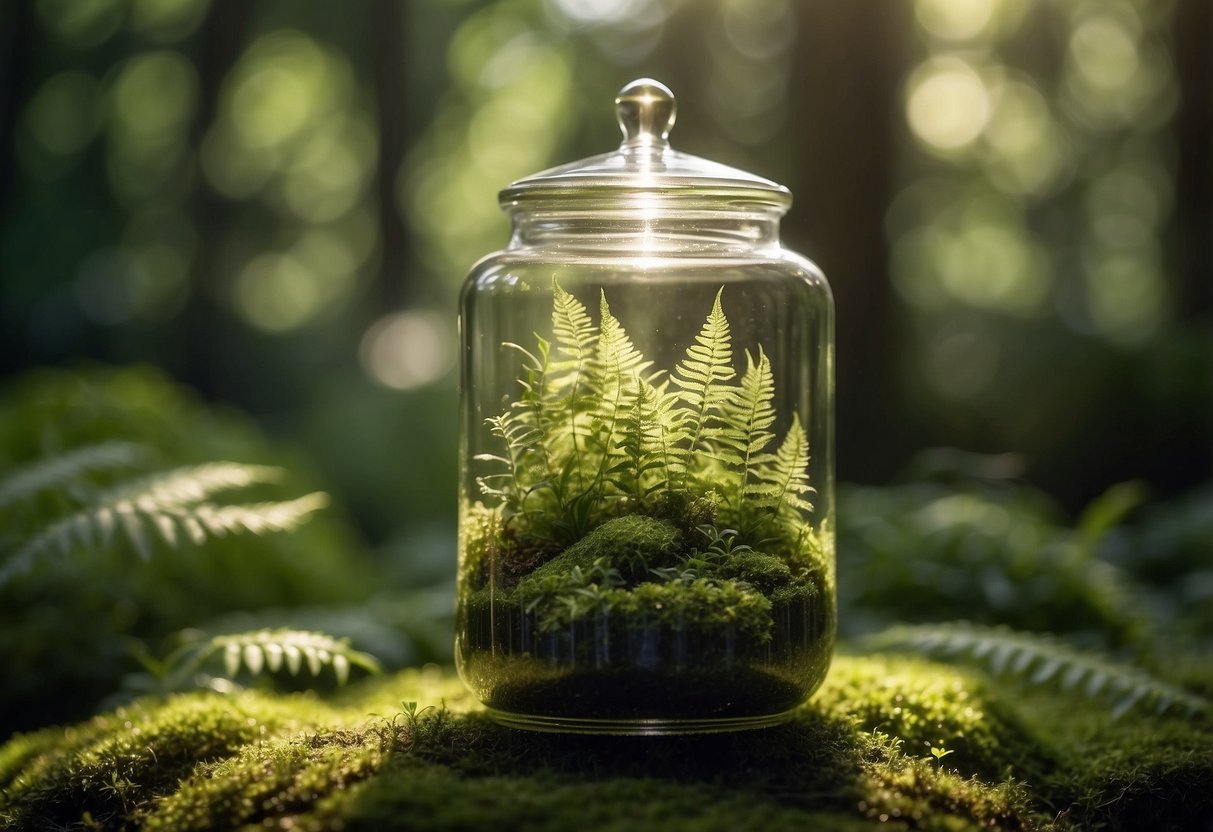
5) Jar Terrarium with Miniature Figures

Creating a jar terrarium with miniature figures is a fun and creative project. Start by selecting a clean glass jar. A mason jar works well.
Add a layer of small rocks for drainage. Next, cover the rocks with moss. This will help keep your soil moist.
Now, place tiny figurines in the jar. You can use anything from little animals to miniature fairy garden pieces. For more ideas, visit this guide.
Arrange your plants around the figures. Use small plants like ferns or succulents. Enjoy your miniature world!
6) Hanging Jar Planter

You can create a beautiful hanging garden using glass jars. These planters can hang from any suitable spot like windows, balconies, or ceilings.
All you need are some jars, sturdy string or twine, and hooks. Fill the jars with soil or water and place your plant inside.
For best results, use small plants that don’t need too much space. Decorate the jars with paint or stickers to add a personal touch to your hanging garden. Your plants will thrive and bring a fresh feel to your space.
7) Painted Jar Vase
A painted jar vase adds a pop of color to your garden. Use a clear glass jar and choose your favorite paint colors. Cover the jar in smooth, even strokes for the best results.
After painting, let the jar dry for 24 hours. To make the paint more durable, place the jar in a cool oven and set it to 350ºF. Bake for 30 minutes.
Add some flowers to your painted vase. Tie a ribbon or twine around the top for extra charm. This easy project is perfect for brightening up any garden space.
8) Aquatic Plant Jar Garden

Starting an aquatic plant jar garden is a simple and beautiful way to enjoy indoor greenery. Choose a clear glass jar to allow sunlight to reach the plants.
Floating aquatic plants like water lettuce and water hyacinth work well. These plants float on the surface with their roots dangling in the water.
Regularly check the water level and add fresh water when needed. Your aquatic plant jar garden will thrive with minimal effort and provide a serene, green accent to any room.
9) Rose Garden in a Jar
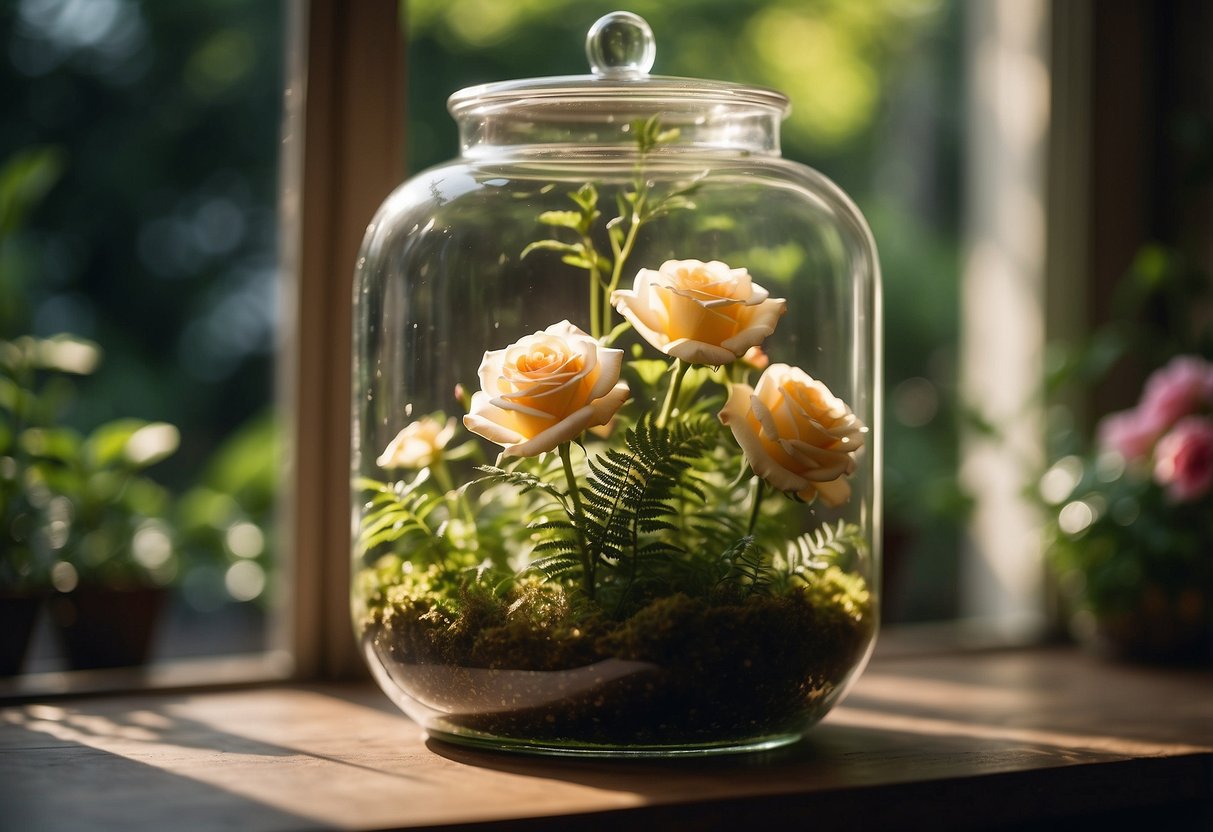
Creating a rose garden in a jar is a charming project that brings beauty indoors. Choose mini roses or small rose cuttings.
Start by layering the bottom with a mix of gravel and horticultural grit for good drainage. Add a layer of compost and plant the rose cutting gently.
Place your jar in a spot with plenty of indirect sunlight. Water sparingly to avoid over saturation. Enjoy watching your rose garden grow and bloom right in the jar.
10) Moss and Fern Jar Ecosystem
Creating a moss and fern jar ecosystem is a fun and rewarding project. First, choose a clear glass jar with a lid. This will help maintain humidity.
Next, you need a drainage layer using small stones. This prevents water from pooling at the bottom.
Add a layer of activated charcoal to keep the ecosystem fresh and healthy. This helps control odor and bacteria.
Then, add a layer of potting soil. Place your ferns and moss carefully on top. Make sure they have contact with the soil.
Lightly mist with water and place your jar in a spot with indirect sunlight. Enjoy your beautiful mini-garden! For a detailed guide, you can check this resource.
Essential Materials For Glass Jar Gardens
Making a glass jar garden can be fun and creative. You will need a few key materials to get started, including the right jar, suitable plants, and the proper soil and substrate.
Choosing The Right Jar
The right jar is important for your garden’s success. Pick a glass jar that gives enough space for your plants to grow. Mason jars or upcycled jars work well. Ensure the jar is clear, so your plants can get sunlight.
Next, think about drainage. Since jars don’t have holes, you might need to add a drainage layer. A thin layer of small rocks or gravel at the bottom can help prevent water from sitting around the roots and eventually causing root rot.
Some jars come with lids. These are great for creating a mini greenhouse effect, which is especially useful for high-humidity plants.
Types of Plants Suitable for Glass Jars
Small plants are best for glass jars. Look for succulents, herbs, or short tropical plants.
Succulents are great because they require little water. Herbs like basil or mint are not only decorative but also practical for cooking. Short tropical plants like ferns or baby’s tears can give a lush look.
If you want a low-maintenance garden, you can use air plants. They don’t need soil and are easy to care for. Just mist them occasionally.
Necessary Soil and Substrate
Using the right soil is key. For most plants, a standard potting mix works well. If you’re planting succulents, choose a special cactus and succulent mix that dries quickly.
Add a layer of activated charcoal above the drainage layer. This helps keep the garden fresh and prevents odors by filtering the water.
For air plants, you won’t need any soil. Just place them on rocks, shells, or decorative moss inside the jar. Make sure the plants are secure and don’t move around too much.
Step-by-Step Guide to Creating a Glass Jar Garden

Creating a glass jar garden is a delightful project that involves a series of straightforward steps. You’ll prepare the jar, carefully plant your chosen greenery, and then maintain your mini garden to keep it thriving.
Preparing The Jar
First, clean your glass jar thoroughly with mild soap and water to remove any residues. Let it dry completely. Choosing the right size jar is crucial; a mason jar is a popular choice due to its accessibility and size.
Next, add a 2-inch layer of coarse sand or pebbles at the bottom for drainage. This prevents water from accumulating and helps maintain the right moisture level inside the jar. To further enhance drainage, place a cut sheet of landscape fabric or weed barrier on top of the pebbles to prevent soil from mixing with them.
Include a 1/4 to 1/2 inch layer of activated charcoal to filter the air and water, keeping your terrarium fresh and preventing mold growth.
Planting Techniques
Once your jar is ready, start adding soil. Use a quality potting mix and make sure it’s appropriate for the plants you’ve chosen. Add about 2-3 inches of soil on top of the charcoal layer. Gently pat it down to remove air pockets.
Picking the right plants is key to a successful jar garden. Small tropical plants, such as ferns and mosses, work well for this environment. Make a small hole in the soil for each plant. Carefully place each plant in its hole and cover the roots with soil. Gently pat the soil around the plants to secure them.
Be creative with the arrangement. Consider the light requirements of your plants and place those needing more light closer to the jar’s edge.
Watering and Maintenance Tips
Watering your glass jar garden correctly is crucial. Since a terrarium retains moisture, you only need to water sparingly. Mist the plants lightly and wait until the soil feels slightly dry before watering again.
To maintain your garden, keep it in a spot where it can receive indirect sunlight. Direct sunlight can cause the jar to overheat, damaging the plants. Regularly check for signs of mold or pests and remove any affected plants immediately.
Prune your plants as needed to prevent overcrowding and ensure they stay healthy. By following these steps, your glass jar garden will flourish and bring a touch of nature to your home.
Creative Decoration and Placement Ideas
Enhancing your glass jar garden involves adding decorative elements, choosing the right spot for their display, and considering seasonal themes to keep your garden looking fresh and vibrant year-round.
Decorative Elements to Enhance Your Jar Garden
Using paint is a simple way to add color to your glass jars. You can paint the outside in solid colors or patterns. Adding ribbons or twine around the neck of the jars gives a rustic feel.
Consider gluing on small ornaments or beads. Using decoupage techniques with floral or vintage-themed paper can also add a charming touch. LED fairy lights inside the jars can make them glow beautifully at night.
Indoor vs Outdoor Placement
Choosing the right placement for your jars is key. For an indoor space, place your jars on windowsills or shelves where they can get enough light. Hanging the jars from rods or hooks in sunny spots adds an artistic flare.
Outdoors, consider hanging jars from tree branches or placing them along garden paths. They can also be lined up on patios or balconies where they can be admired easily.
Seasonal Themes and Ideas
Modify your jar garden with the seasons to keep it dynamic. In spring, add colorful flowers or pastel-painted jars. For summer, use bright, bold colors and possibly beach-themed decorations like small seashells.
In fall, opt for warm tones like oranges and reds, and add leaves or small gourds. Winter can feature frosty paint effects, evergreen branches, and tiny pinecones to create a festive atmosphere. Don’t be afraid to change it up with the seasons to keep your space looking fresh and exciting.


