

Orchid Garden Growth Tips: Expert Advice for Thriving Blooms
Growing orchids can be a rewarding experience, but it requires some know-how to keep these beautiful flowers thriving. Whether you’re a beginner or an experienced gardener, understanding the basics of orchid care will help your plants flourish.

You will discover simple yet effective ways to nurture your orchid garden, ensuring it remains healthy and vibrant. From choosing the right potting mix to controlling the environment, these tips will set you on the path to becoming an orchid expert. Dive in to enhance your gardening skills and enjoy the beauty of blooming orchids all year round.
1) Choose the Right Orchid Species

Picking the right orchid species is key to your gardening success.
If you’re a beginner, consider starting with Phalaenopsis or Cymbidium orchids. They are known for being easier to grow and more adaptable to different conditions.
Remember, some orchids thrive better indoors, while others flourish outside. Make sure to match the orchid to your environment.
2) Maintain Optimal Humidity Levels

Orchids thrive best in high humidity, typically between 50% to 80%. This range ensures they get enough moisture without being soggy.
If your indoor air is too dry, consider a cool-mist humidifier. It can easily boost humidity levels around your plants. You can also try using a humidity tray.
Another option is to place your orchids in a terrarium or mini-greenhouse. These can help maintain the right humidity levels while adding a decorative touch to your space. Orchids like Phalaenopsis and Cattleyas will thank you for this!
3) Provide Adequate Lighting

Your orchids need the right amount of light to grow well. Natural light is great, but if it’s not enough, consider using grow lights. LED grow lights are a good choice since they use less energy and give the right light spectrum.
Place the lights about 12-24 inches above your orchids. Adjust the height as your plants grow. Watch the leaves; dark green leaves might mean the orchids need more light.
4) Use Well-Draining Potting Mix

When growing orchids, you need a potting mix that drains well. Regular soil can hold too much water, leading to root rot.
Look for materials like fir bark, sphagnum moss, peat moss, lava rocks, perlite, and charcoal to create a mix. These materials provide the right balance of moisture and aeration.
Remember to check the mix regularly. Water your orchids only when the potting mix is dry to the touch. This helps prevent overwatering.
5) Repot Orchids Regularly
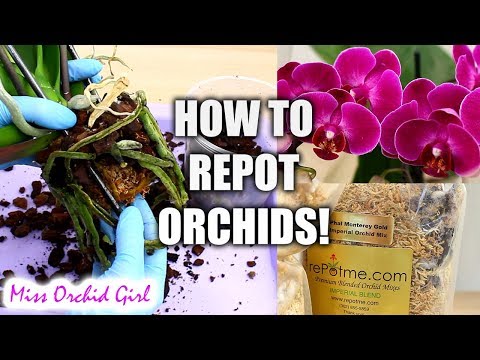
Regularly repotting your orchids is crucial for their health. Orchids often outgrow their pots, leading to cramped roots.
First, prepare your materials, including a new pot and fresh potting mix. Remember to sterilize your tools to prevent diseases from spreading. You can follow detailed steps from this Gardenista guide.
Gently remove the orchid from its current pot. The American Orchid Society suggests repotting within two weeks of bringing a new plant home.
Carefully place your orchid in its new pot, ensuring it’s stable.
6) Water Orchids Appropriately

Watering your orchids the right way is crucial. Orchids do not like to sit in water, as their roots can rot. Use room-temperature water and avoid chlorinated water if possible.
One popular method is to place the orchids in a container with some pebbles and water. Keep the water level one-third up the height of the pebbles in summer and one-quarter in winter. Make sure to exchange the water weekly.
Allow the orchid roots to dry out between waterings. This helps prevent rot and encourages healthy roots. If you’re growing orchids in water, let them dry out for about a day after several days of water exposure. This balance of wet and dry helps your orchids thrive.
7) Fertilize with Balanced Nutrients

To help your orchids bloom beautifully, use fertilizers with balanced nutrients. For Dendrobium orchids, a 20-20-20 fertilizer blend works well. Apply it at 1/4 strength every 3-4 weeks during active growth.
Cattleya orchids need different care. Use a 3-12-6 blend. Fertilize every 2-3 weeks in the growing season and monthly in winter.
Always test your potting mix’s pH levels. Aim for a pH between 5.5 and 6.5. If needed, adjust the pH with sulfur or lime. Make sure to also balance light, temperature, and humidity for optimal growth.
8) Prune Dead or Diseased Parts
Pruning dead or diseased parts from your orchid is essential for its health. Remove yellowing or damaged leaves to keep your orchid looking good.
Make sure to use sterilized pruning shears. Dip them in rubbing alcohol for 30 seconds to avoid spreading disease.
Cutting dead roots or flower spikes will help your orchid grow better. Avoid cutting healthy parts to prevent unnecessary harm.
If a stem turns yellow, use sharp scissors to prune it. This minimizes damage and disease risks. Only cut after the flowers have faded.
9) Avoid Overcrowding Plants
When you crowd your orchids, they struggle to get the nutrients and light they need. Each plant should have enough space to breathe and grow.
Keep your orchids well-spaced to prevent diseases from spreading easily. Overcrowding can lead to poor air circulation, which promotes fungal infections.
Give each orchid its own pot or enough space in your garden. This will help them thrive.
10) Monitor for Pests and Diseases

Keep a close eye on your orchids for signs of pests and diseases. Common pests like spider mites can hinder growth. Look out for tiny, moving specks on the leaves.
Brown rot, caused by bacteria, can rapidly infect orchids. Watch for water-soaked spots that turn dark. Prompt action is crucial since these infections spread quickly, especially in humid conditions.
Ensure good air circulation and cleanliness to reduce the risk. Regularly disinfect your tools and growing area. If you spot issues, treat affected plants with appropriate insecticides or fungicides. This will help maintain the health and beauty of your orchids.
Basics Of Orchid Garden Care

Caring for orchids involves selecting the right species and creating the best growing conditions. Let’s look at these aspects in detail to help your orchid garden thrive.
Choosing The Right Orchid Species
Orchids come in various species, but some are better suited for beginners. Moth orchids (Phalaenopsis) are a popular choice because they are forgiving and easy to grow. Dendrobium orchids also make a good choice due to their hardiness.
When selecting an orchid, look for plants with firm, green leaves and plump roots. Avoid orchids with yellowing foliage, mushy spots, or fading flowers. These signs can indicate poor health.
Mini orchids can be tricky for beginners, so starting with a medium-sized plant is often easier. Larger orchids might be more challenging and a bigger investment while you are still learning.
Ideal Growing Conditions
Orchids need specific conditions to flourish. They prefer bright, indirect sunlight. Direct sunlight can scorch the leaves, so place them near a window with filtered light.
Keep the room temperature around 70-80°F (21-27°C) during the day and slightly cooler at night. They also thrive in high humidity. You can increase humidity by placing a tray of pebbles and water under the pot or using a humidifier.
Proper airflow is crucial. Fresh air helps prevent fungal diseases. Make sure the growing area is well-ventilated.
Watering is essential but be cautious. Let the orchid dry out between waterings. Overwatering can lead to root rot. Use a potting mix specifically for orchids, not regular soil. This mix usually includes bark, sphagnum moss, and perlite, which helps with drainage and air circulation.
Watering And Fertilizing Tips

To keep your orchid garden healthy and blooming, you need to pay attention to both watering and fertilizing. Proper watering schedules and the right type of fertilizers are essential for optimal growth.
How Often To Water
Watering orchids correctly can be tricky. Orchids generally prefer less frequent watering. Water every 7-10 days if grown indoors. Check the potting mix; it should be dry before you water again.
Use the “dipping method” by placing the pot in water for about 10-15 minutes. This ensures that roots absorb enough moisture. Drain well to avoid waterlogging. Avoid using cold water, which can shock the roots. Instead, use room temperature water.
In hotter months, you might need to water more frequently. Monitor the potting mix and adjust your schedule accordingly. If the leaves appear wrinkled or the roots turn silvery-white, it’s time to water.
Best Fertilizers For Orchids
Fertilizing orchids is vital for their health and blooms. Use orchid-specific fertilizers for best results. A balanced formula like 20-20-20 works well during the growth phase.
During the flowering phase, switch to a bloom booster fertilizer. These typically have a higher phosphorus content, such as 10-30-20, to encourage more blooms.
Fertilize your orchids every 14 days. Add the recommended amount to water and apply using the same “dipping method” as your watering routine. Be cautious not to over-fertilize, as this can lead to salt deposits on the roots, which can harm the plants.
Monitoring and adjusting your approach based on your orchids’ needs will help keep them thriving and beautiful.


