

Garden Border Tips: Create Stunning Edges for Your Yard
Creating a beautiful garden border can transform your outdoor space into a stunning and inviting area. Whether you’re a seasoned gardener or just starting, there are simple tips that can help you design the perfect border. From choosing the right plants to arranging them effectively, these pointers can make all the difference.

Wondering how to get started with your garden border? By focusing on essential aspects like soil types, plant selection, and color schemes, you can easily create a garden border that not only looks great but also thrives throughout the seasons. This guide will provide you with the valuable information you need to bring your vision to life.
1) Create Curved Edges

Curved edges give your garden a soft, natural look. They can make your space appear larger and more inviting.
To start, place a garden hose along your desired edge to form a smooth curve. This helps you visualize the shape before digging.
For the digging, use a spade or a half-moon edger to cut along the line. Keep the edge clean and neat as you go. For more tips, check out Better Homes & Gardens.
You can also see examples and inspiration at The English Garden.
2) Use Natural Stone

Natural stone can give your garden a timeless, elegant look. Stones absorb moisture, keeping the soil fertile and your plants healthy.
Selecting flat, uniform stones is ideal for a stable border according to this guide. Fieldstones, flagstones, or river rocks are good choices.
Arrange your stones and fill gaps with soil or gravel. This not only secures the edging but also adds a natural touch to your garden as suggested by experts.
3) Add a Brick Border

Start by digging a trench where you want the border. Make sure it’s wide enough to fit the bricks.
Next, mix sand and cement to create a sturdy base. Spread this mixture at the bottom of the trench.
Place the bricks one by one. Use a rubber mallet to tap them into place. Check that each brick is level before moving to the next.
For more detailed steps, you can visit The Spruce.
4) Install Metal Edging

Metal edging gives your garden a clean, sleek look.
First, dig a trench along the area where you want to install the edging. Make sure it’s deep enough so that a third of the metal strip is below ground.
Place the metal edging in the trench. Use a rubber mallet to tap it into place.
Secure the edging with stakes. Slide the stakes through the slots in the edging. Tap them down until the top is level with the edging strip.
Finish by filling the trench with soil and packing it down firmly. This will keep the edging stable and in place.
For more details, check out these installation steps.
5) Plant Perennials

Planting perennials in your garden borders can add beauty and structure year after year.
Choose low-growing varieties like irises, asters, and daylilies for a neat look. These plants often have dwarf versions that stay compact and colorful.
Perennials like Salvia splendens create habitats for pollinators. This adds life and movement to your garden.
Make sure you pick plants suited to your climate and soil. This ensures that they thrive with minimal effort.
6) Include Solar Lights
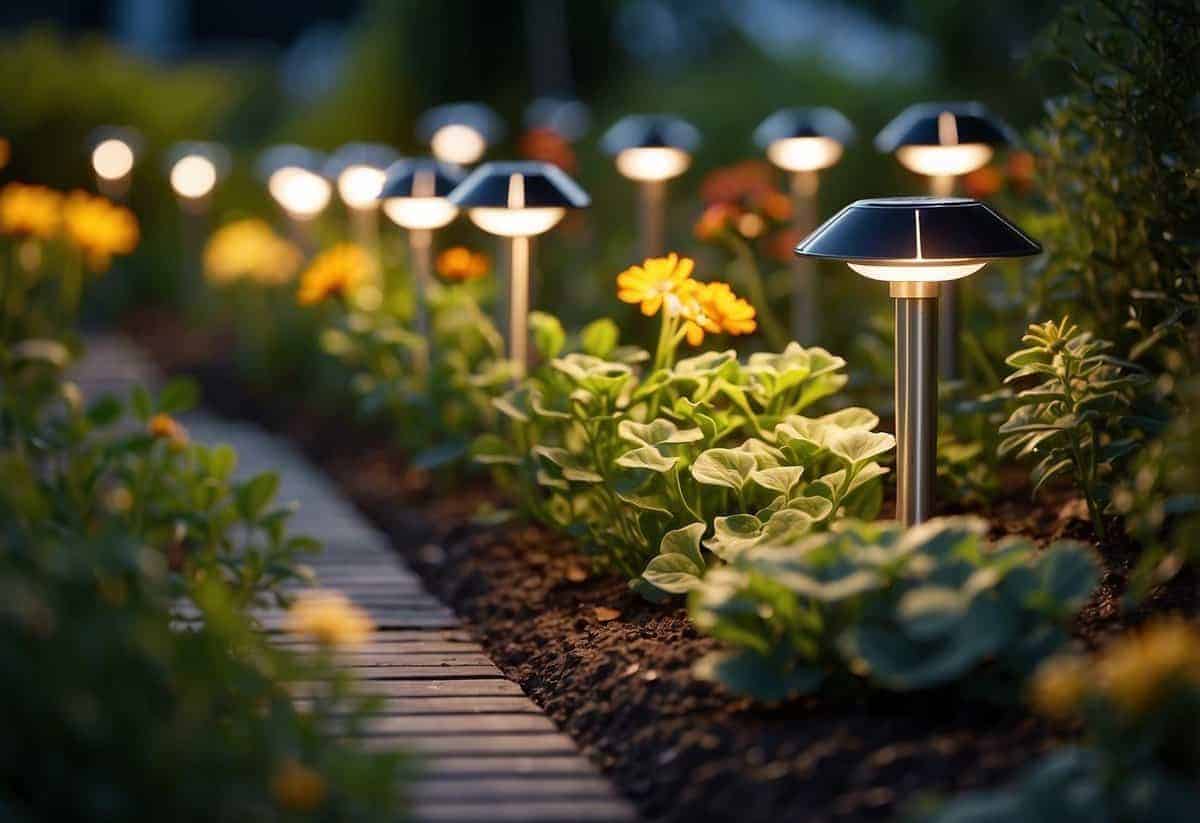
Adding solar lights to your garden border is a great way to enhance beauty and safety. They can illuminate paths and highlight plants.
Decorative solar stakes are perfect for adding charm to your borders. These lights come in various styles and colors.
Opt for small ground lights to line edges of flower beds. Try adjustable solar lights to focus light where it’s needed most. Use solar lights to enjoy your garden both day and night.
7) Use Wooden Sleepers

Wooden sleepers are a great choice for garden borders. They add a rustic charm and are very sturdy. You can use them to create straight or curved edges easily.
To start, dig a trench along the edge of your garden. Make sure it’s deep enough to hold the sleepers in place. Lay a base of sand or mortar for stability. Then, place the sleepers in the trench, making sure they are level and aligned.
Using wooden sleepers can transform your garden and give it a unique look. Plus, they’re durable and long-lasting, which means less maintenance for you.
8) Integrate Pebbles

Using pebbles in your garden border can add both texture and style. Start by removing any existing grass or plants from the area. Dig the ground about 2-3 inches deep and level it.
Lay down landscape fabric to prevent weeds from growing through the pebbles. This keeps maintenance easy and your garden looking neat. Spread the pebbles evenly for a clean and polished finish.
9) Try Raised Beds
Raised beds are great for adding structure to your garden. They help keep your plants organized and make it easier to manage your gardening tasks.
You can use materials like wood or stone for the borders. Some people choose to use railway sleepers for a unique look.
Raised beds also improve soil drainage and can reduce the risk of pests. If you plan to grow vegetables, this can be particularly beneficial.
Make sure to fill your raised beds with a mix of compost and topsoil to provide rich nutrients for your plants. You can even add well-rotted manure or leaf mold for extra nourishment, as suggested here.
10) Add Decorative Fencing

Decorative fencing can boost the look of your garden. Think about using different styles like a slatted fence, which can frame your garden while still letting you see through to the greenery beyond.
A DIY bug hotel fence art can add a unique touch. This idea not only decorates your garden but also attracts beneficial insects like bees and ladybugs.
You can also get creative with other materials. Repurposing terra cotta pots to build a colorful border can make your garden vibrant and playful.
Choosing The Right Garden Border Materials

When choosing garden border materials, consider durability, aesthetics, and how well they blend with your garden style. Each material offers unique benefits and can enhance the look of your yard.
Wooden Borders
Wooden borders give your garden a natural, rustic feel. They blend well with plants and can look charming in almost any garden. Common wood types used are cedar and redwood due to their resistance to rot.
Pros:
- Natural Look: Blends well with plants and landscaping.
- Ease of Installation: Simple to install with basic tools.
- Affordability: Often cheaper than some other materials.
Cons:
- Maintenance: May require regular treatment to prevent decay.
- Durability: Less durable compared to stone or metal.
Using wooden borders can give your garden a warm, inviting appearance while being a cost-effective option.
Stone And Brick Borders
Stone and brick borders are sturdy and add a timeless, classic look to your garden. They are perfect for formal and structured gardens, providing a clean and defined edge.
Pros:
- Durability: Can last for decades without much maintenance.
- Aesthetics: Offer a sophisticated and classic look.
- Versatility: Can be arranged in various patterns and shapes.
Cons:
- Cost: Generally more expensive than wood or plastic.
- Installation: Requires more effort and skill to install correctly.
For a traditional and elegant touch, stone and brick borders are an excellent choice.
Metal Edging
Metal edging provides a modern, sleek look with sharp, clean lines. It can be made from materials like aluminum or steel and is very durable.
Pros:
- Durability: Extremely long-lasting and resistant to weather.
- Thin Profile: Takes up less space for planting areas.
- Minimal Maintenance: Requires little upkeep once installed.
Cons:
- Cost: Can be expensive, especially high-quality steel.
- Cold Appearance: May not blend well with more natural landscapes.
If you prefer a contemporary style and want something long-lasting, metal edging could be the perfect choice for your garden.
Installing Garden Borders

Installing garden borders involves three main steps: preparing the ground, placing and spacing the border materials, and securing the borders for long-lasting edges.
Preparing The Ground
First, you need to prepare the ground where you want to install your garden border. Start by using a spade to dig a trench. The trench should be about 3 to 6 inches deep and slightly wider than your edging material.
Remove any roots and rocks you find while digging. Use pruning shears to cut away small roots that might get in the way. Once the trench is clean, pack the soil by walking over it.
For a smoother border, level the ground in the trench using a rake. Ensuring the bottom is even will help keep your edging straight and stable. Adding a layer of sand at the bottom can offer extra stability.
Placement And Spacing
Next, it’s time to place your garden borders into the trench. Measure the length of your border area to ensure you have enough material. Each piece of edging should fit snugly against the next.
Position each piece of edging material in the trench. Keep them aligned and tight to avoid gaps. This will give your border a seamless look.
For curved edges, bend the material gently to match the curve of your garden bed. If necessary, cut the edging to fit tricky spots. Make sure all pieces are pressed firmly into the trench.
Securing The Borders
Finally, secure your garden borders in place. You can use stakes or spikes, depending on the type of edging material you have. Wood and plastic edging often come with matching stakes.
Hammer stakes into the ground at regular intervals, usually about every foot or so. This helps keep the edging stable and prevents it from shifting.
Check the alignment of your border as you secure it. Adjust the positions if needed to maintain straight or curved lines. For extra security, add more stakes at key points, especially in areas where the ground may shift.
By following these steps, you’ll create a clean, well-defined border for your garden, enhancing its overall appearance.


