

Kale Gardening Tips: A Guide to Growing Nutritious Greens at Home
Kale is a nutritious and versatile vegetable that is popular in many gardens. Growing your own kale can be a rewarding experience, giving you fresh greens right from your backyard. Learning the best tips for kale gardening can help you cultivate healthy plants and enjoy bountiful harvests.

With the right care and attention, you can enjoy delicious kale throughout the growing season. This article will share useful tips to help you succeed in growing this leafy green, whether you’re a beginner or have some gardening experience. Get ready to dig in and discover the joy of kale gardening!
Choose a Sunny Spot

When growing kale, selecting the right location is key. You should pick a spot that gets plenty of sunlight.
Kale loves light and needs at least six hours of direct sunlight each day. If you live in a warmer climate, be mindful about not giving too much sun. Too much heat can make the leaves bitter or wilt.
If your garden has some shade, that’s okay too! Just make sure it receives about four to six hours of sun daily. By finding the right balance of sun and shade, your kale can thrive.
Test your soil pH

Testing your soil pH is an important step in growing healthy kale. Kale prefers a slightly acidic to neutral soil with a pH between 6.0 and 7.0.
You can easily test your soil at home using a soil pH kit. These kits are available at garden centers and online.
Follow the instructions on the kit for accurate results. If your soil is too acidic or alkaline, you can amend it.
Adding lime can raise the pH, while sulfur can lower it. Adjusting your soil pH helps create the right environment for kale to thrive.
3) Start with quality seeds

Starting with quality seeds is crucial for successful kale gardening. Look for seeds that are fresh and from a reputable source. This can greatly improve your chances of healthy plants.
You should also check the seed variety. Different types of kale have unique flavors and textures. Choose a variety that matches your taste and gardening conditions.
Before planting, consider doing a germination test. This helps you know if your seeds are viable. A simple test can save you time and frustration in the garden.
Taking these steps will help you grow strong, vibrant kale. Happy gardening!
4) Sow seeds directly

Sowing kale seeds directly in your garden is simple and effective. Choose a spot with well-draining soil that has good nutrients. You might want to mix in some compost to help the plants thrive.
Plant the seeds about half an inch deep. Space them about 12 inches apart to give them room to grow. Make sure to keep the rows 18 inches apart for easy access when harvesting.
Kale prefers cooler temperatures, so timing is key. Plant your seeds 2-4 weeks before the expected frost date. This way, your kale can mature in cool weather, leading to tastier leaves. Happy gardening!
5) Space plants properly
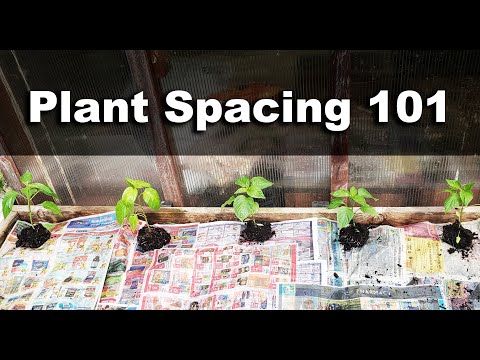
When planting kale, it’s important to give each plant enough room to grow. For full-sized kale, space the plants about 12 to 18 inches apart. This allows room for their leaves to spread out without overcrowding.
If you are planting in rows, make sure the rows are 18 to 24 inches apart. This spacing helps improve airflow around the plants, reducing the risk of fungal diseases.
If you’re starting from seeds, thin out seedlings to keep them at the correct distance once they have a few true leaves. Proper spacing will ensure your kale grows strong and healthy.
6) Water consistently

Watering your kale plants is very important. Kale needs consistently moist soil to grow well.
You should aim to give your plants about an inch or two of water each week. Adjust this amount based on rainfall.
Using well-draining soil helps prevent water from sitting too long, which can cause root rot. Check the soil regularly with your fingers. If it feels dry, it’s time to water.
By keeping a steady watering schedule, you’ll help your kale thrive and enjoy fresh leaves from your garden.
7) Mulch to retain moisture

Mulching is an easy way to help your kale plants stay healthy. It keeps the soil moist, which is really important for good growth.
Using a layer of mulch around your plants can also help prevent weeds. This means your kale won’t have to compete for water and nutrients.
Organic materials like straw, shredded leaves, or grass clippings work great. Make sure to apply a 2-3 inch layer around your kale, but don’t cover the stems to avoid rot.
Mulch not only keeps moisture in but also helps regulate soil temperature. This creates a nice environment for your kale to thrive.
8) Rotate crops annually

Rotating your crops each year is an important step in kale gardening. Since kale is part of the brassica family, it can attract pests and diseases that can affect your plants.
By moving your kale to a different spot in your garden, you help reduce the chance of soil-borne diseases. Avoid planting kale in the same area as other brassicas like cabbage or broccoli that were grown in the past two years.
Try to follow a rotation plan where you change the location of your kale regularly. This simple practice can lead to healthier plants and a better harvest for you.
9) Use organic fertilizers

Using organic fertilizers can greatly benefit your kale plants. They provide essential nutrients that help your kale thrive and grow healthy.
Mixing compost into your soil before planting is a great start. You can also side-dress with more compost as the plants grow.
If you’re growing kale in containers, you’ll need to fertilize more often. Use a balanced, water-soluble fertilizer every 7 to 14 days. This will keep your potted kale well-fed.
Organic fertilizers not only nourish your plants, but they also help improve soil health over time. This is good for your garden’s future crops too!
10) Control pests naturally

Controlling pests on your kale can be easy and safe with natural methods. Start by checking your plants regularly for any signs of insects.
You can simply pick off worms and egg masses. Place them in soapy water to eliminate them. Another option is to use a bacterial spray like Bacillus thuringiensis kurstaki (Btk), which targets specific pests.
For aphids, mix 1 tablespoon of dish soap with 1 quart of water. Spray this solution on your plants every few days until the problem is gone.
Don’t forget to maintain good airflow between plants, and keep them dry to prevent pests. Keeping your garden clean and free from debris also helps reduce infestations.
Soil Preparation and pH Levels

Preparing your soil correctly is key to growing healthy kale. The right pH level and quality of soil can help your kale thrive and produce a better harvest.
Testing Soil pH
Before planting kale, testing your soil’s pH is important. Kale grows best in a slightly acidic to neutral pH level of 6.0 to 7.0. You can use a soil test kit, which is available at garden centers, to check this.
Follow the kit instructions to take samples from different areas of your garden. If your soil’s pH is too low (acidic), you can add lime to increase it. If it’s too high (alkaline), adding sulfur can help lower it.
Regular testing, at least once a year, keeps your soil balanced. This simple step will lead to healthier plants and a successful garden.
Improving Soil Quality
To improve soil quality for kale, start with good compost. Mixing in several inches of compost or aged manure will provide vital nutrients. Kale prefers well-draining, loamy soil.
You can mix in an all-purpose fertilizer or organic compost into the top 3 to 4 inches of soil.
It’s also helpful to ensure good drainage. Consider adding sand or perlite if your soil is too clay-like.
Regularly amending your soil with organic matter keeps it rich and productive. Healthy soil leads directly to better growth and disease resistance in your kale plants.
Optimal Planting Conditions

To grow healthy kale, you need to pay attention to when and where you plant it. Both the timing of planting and the location in your garden are crucial for a successful harvest. Here’s what you need to know.
Ideal Planting Time
Kale is quite adaptable but has specific timing for the best results. Ideally, you should plant kale about 4 to 5 weeks before the last frost in spring. This allows the plants to establish themselves while the weather is still cool.
For a fall crop, consider planting kale 6 to 8 weeks before the first frost. This timing ensures the plants grow well, tasting better after a light frost. You can plant seeds directly in the soil or start them indoors.
Check your local climate to find the ideal dates. Consistent temperature is key, as kale thrives in cool weather and can even tolerate light frost.
Choosing the Right Location
Location plays a significant role in the growth of your kale. Full sun exposure is essential, so look for a spot that receives at least 6 to 8 hours of sunlight daily. Kale enjoys sun, but it can also benefit from partial shade in very hot climates.
Make sure the soil drains well. Kale prefers loamy or sandy soil with a pH level of 6.0 to 7.0. Avoid areas where water stands after rain, as this can cause root rot.
Consider spacing as well. You need 12 to 18 inches between each plant to allow for proper growth. If you choose to use a raised bed, this can enhance drainage and make maintenance easier.
Watering and Maintenance

Caring for kale includes managing its water needs and using effective mulching techniques. Both play an important role in growing healthy and tasty plants.
Watering Frequency
Kale thrives best with consistent watering. You should water your plants about once a week, ensuring the soil remains moist but not soggy.
A good rule of thumb is to provide about 1 to 1.5 inches of water weekly.
Check the soil moisture by inserting your finger about an inch deep. If it feels dry, it’s time to water.
In hot weather, you may need to water more often, possibly every 3 to 4 days.
Early morning is the best time to water. This helps reduce evaporation and allows leaves to dry before nightfall, which can prevent diseases.
Mulching Techniques
Mulching helps retain moisture and suppress weeds in your kale garden. You can use organic materials like straw, wood chips, or grass clippings. Lay about 2 to 3 inches of mulch around your plants.
This layer keeps the soil cool and moist, especially during hot spells. It also breaks down over time, adding nutrients back into the soil.
Make sure to leave some space around the base of the plants to prevent rot. Replenish the mulch as needed to maintain the desired thickness. Regular mulching will make a big difference in your kale’s health and yield.


